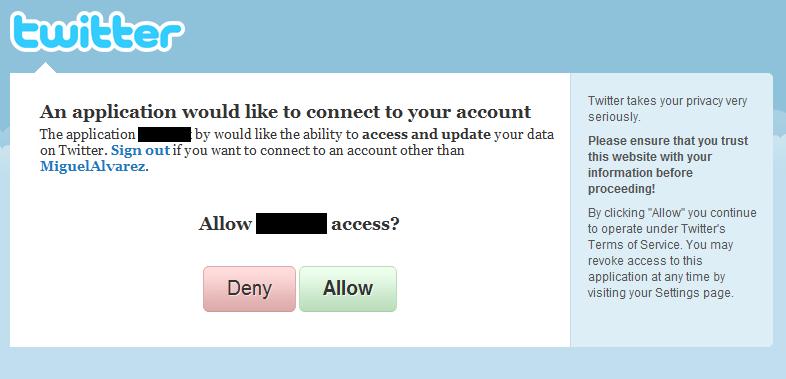
Welcome to part two of this series. In the last post we created the sign in with twitter button with all the required parameters, clicking the button should take you to the following screen.

Twitter's authentication screen
If The User Denies Access
If users click the deny button they will be sent to a screen where they will be given the option to stay in twitter or go back to your site when the click your app’s name.
If they decide to go back they will be sent to your callback url with a get parameter called “denied”.

The user has clicked "Denied"
If The User Allows Access
If users allow access they will still be sent to your callback url but with a GET parameter called oauth_token. Using the value of oauth_token and request_token, which we stored in a session, we can ask twitter for an access token.
The access token can then be used to call twitter API methods that require authentication.
The Callback Script
We are going to start off the script by starting the session engine and including the two files we need, Zend/Oauth/Consumer.php and oauthConfiguration.php and making an OAuth object.
session_start();
require_once 'Zend/Oauth/Consumer.php';
require_once 'oauthConfig.php';

$oauth = new Zend_Oauth_Consumer($config);
After we have instantiated the class we need to check for one of three possible outcomes:
- The oauth_token GET variable and request_token SESSION are set so we can try to get the access token.
- The oauth_token GET variable is not set but the denied GET variable is
- None of the GET variables are set.
if (isset($_GET['oauth_token']) && isset($_SESSION['request_token'])) {

// try to get the access token

}elseif(!empty($_GET['denied'])){
	echo 'you have denied us access to your twitter crendentials';
}
else {
    echo 'Invalid callback request. Oops. Sorry.';
}
How To Get The Access Token
We have taken care of the last two possible outcomes, getting and storing the access token is pretty straight forward.
    try{
		$access = $oauth->getAccessToken($_GET, unserialize($_SESSION['request_token']));
	}
	catch(Exception $e)
	{
	 echo 'Error: '.$e->getMessage();
	 exit (1);
	}

    $_SESSION['access_token'] = serialize($access);
    $_SESSION['request_token'] = null;
Let’s take a look at our callback script so far.
session_start();
require_once 'Zend/Oauth/Consumer.php';
require_once 'oauthConfig.php';

$oauth = new Zend_Oauth_Consumer($config);

if (isset($_GET['oauth_token']) && isset($_SESSION['request_token'])) {
    try{
		$access = $oauth->getAccessToken($_GET, unserialize($_SESSION['request_token']));
	}
	catch(Exception $e)
	{
	 echo 'Error: '.$e->getMessage();
	 exit (1);
	}

    $_SESSION['access_token'] = serialize($access);
    $_SESSION['request_token'] = null;

/*
*
* This is where our update stats textbox will be
*
*/

}elseif(!empty($_GET['denied'])){
	echo 'you have denied us access to your twitter crendentials';
}
else {
    echo 'Invalid callback request. Oops. Sorry.';
}
You have probably seen websites that let you add your account after you have made an account with them. If this is the type of website you want to make, what you want to do is store the access token in your database. Since twitter’s access tokens don’t expire you can use them even when the user is not logged in to twitter.
That’s it for part two of this tutorial, in the next post we will add a text box to this script and use JQuery to update the users’s status.